I don't really understand what you're trying to do, and your image isnt uploaded correctly so I can't see the output. A better way, if I am on the right track for what you might want would be to open both of your models in the same window.
Here's an example:
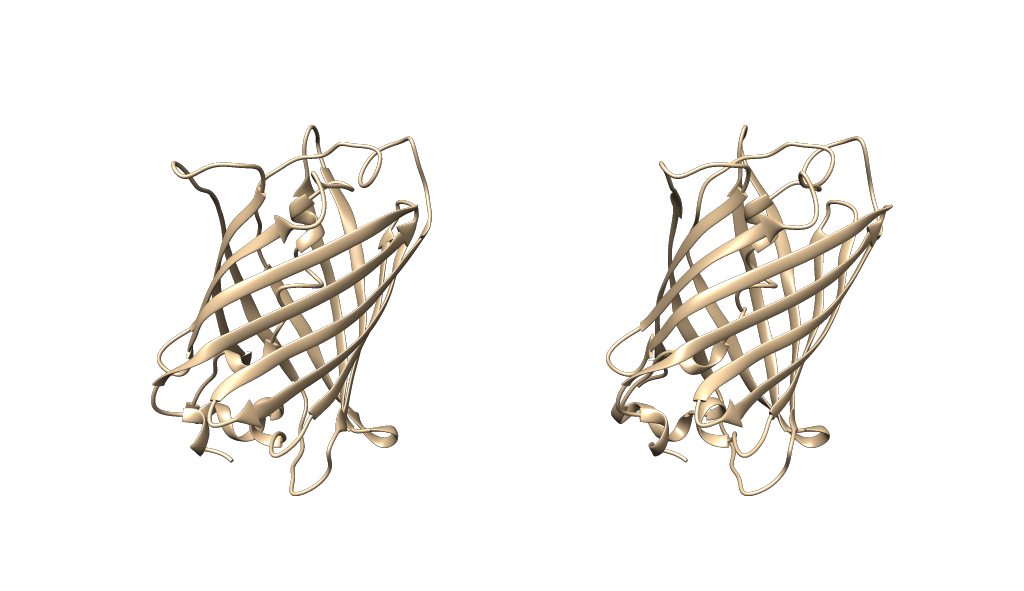
Lets say I open PDB ID 5B61 - a GFP model (I deleted some of the additional models that came from the crystallography process). For simplicity I'll just duplicate the first model to serve as the second example.
So, I have 2 'models of interest' open in the same window.
Orienting the structures
You can use MatchMaker under the Tools -> Structure Comparison menu to fit your models on top of each other, such that they're in close to the same orientation (or the command matchmaker #0 #1). You may have to do some initial model placement by hand to avoid the RMSD algorithm getting 'stuck' in low RMSD confirmations that are not correct - depends on your models similarities.
Spacing and positioning models
Then use the tile function under the same menu as before to position your 2 models apart automatically (tile all col 2)
Should give you something looking like this so far:
Now, in order to be able to manipulate both structures identically, the key is to set their rotations to independent like so:
set independent
Surface colouring etc
I'm going to use the electrostatic preset here but I assume you already know how to colour in your protein models according to your desired output (Presets -> Interactive 3)
Labelling
In order to have your labels move with the atoms to which they correspond, you need to make sure you use 3D Labels, not 2D labels. 2D labels only exist in the x y plane of the screen, and arent 'attached' to anything in the scene. 3D labels on the other hand are physical objects in the x y z scene, and will therefore move when you move the models.
Select the residue you want, then go to Actions -> labels and label accordingly. You will need to hide the surface to be able to select the residues, unless you apply the labels programmatically.
I've ended up with something that looks like the below. I've colored the residue I selected pink, and labelled it in each structure with its 1 or 3 letter name. I've made the surface 70% transparent too just so you can see what I've labelled on the ribbon structure.
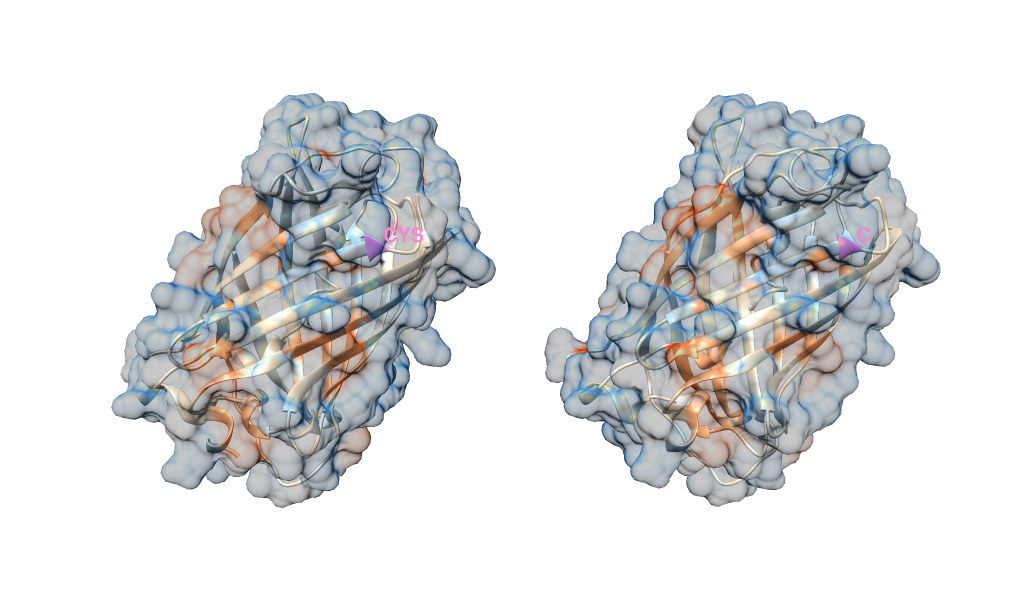
Note you cannot colour individual elements of a surface directly - a surface is a single object. Instead, the surface inherits the colour of the residue.
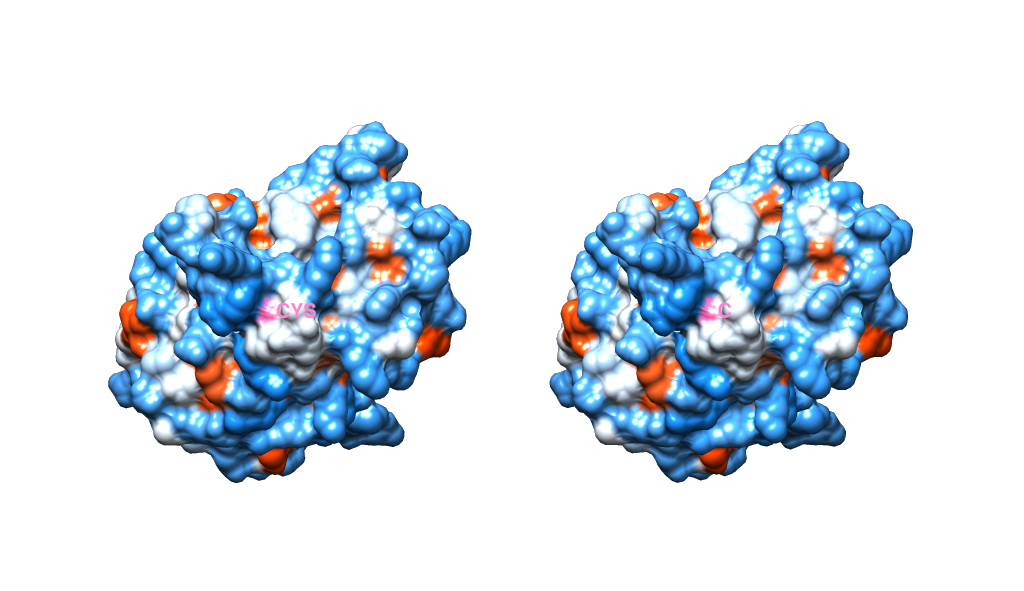
To show you this more concretely, here's the same scene with the opacity of the surface restored. You can see the labels move with the structure, the surface is pink in that location. Notice also how they've rotated identically because they are independent of one another.
One final thing to note is that, when you have 2 models side by side, you will most likely want to switch to using an orthographic camera, so that the perspective doesn't look to alter the geometry on a page ( you can do this through Tools -> Viewing Controls ->Camera). The below image is also in orthographic mode.


@jrj.healey Thanks for very descriptive answer. This worked for me. Tile function was a life saver. One question though, where can I find the option that lets me select 2D or 3D labels ? Thanks once again !
Here is the documentation for Chimera's 2D Labels:
http://www.cgl.ucsf.edu/chimera/docs/ContributedSoftware/2dlabels/2dlabels.html
I can't find the doc page for 3D labels, but you can consult their help mailing list (just google " UCSF Chimera 3D labels" and you'll find various previous questions).
However, adding a 3D label is as simple as selecting the residue or atom you want (
Ctrl-Left Click), then navigate to theActions -> Labelmenu. You can usecustomif you want to label the position with an arbitrary string.